Showing posts with label Fussy Cutting. Show all posts

Monday, 8 February 2021

Technique Time with Gail - February 2021


Hello Squashettes!  Gail here today to share a few embossing folder tips!
You might have come across these before, but I do like to mention the why, instead of just saying you should do it like this.  Of course, you are free to do it any way you like, but hopefully mentioning some effects and consequences will make it more relevant.

My first tip today is:

If possible, orientate your folder so the hinge of the folder goes through your squash machine first

When you emboss something it stretches the material.  Some materials will stretch more than others.  The more detail on your folder the more stretch of your paper.  This is why sometimes when you emboss a thin flat piece of card it warps.  Thicker card tends to warp less, but puts more strain on your folder and also your machine.

By putting the hinge through the machine first it allows the folder to relax and any extra pressure is unrestricted by the open ends.  If the hinge is the last thing to go through it can get quite stressed if things are not perfectly aligned, and if the material you are embossing stretches a lot it can end up being pressed against the folder hinge, which may break your folder, or even crack a plate on your machine.  The hinge is also the thickest part of the folder so if your 'sandwich' is too thick it's best to find out sooner rather than later.....


Tip two

Twofers!

Emboss two pieces of card at the same time!  You get an emboss and a deboss in one go! I used Cuttlebug Garden Tools folder and a piece of white and pink card.  I inked the emboss side (white card) with green ink and the deboss side (pink card) with pink ink and then put both pieces of card through the machine together.   This isn't useful for word/number folders LOL, unless you are having an Alice type day.


Tip three
 
Stretch your folders

If you have folder that has a perfectly repeating pattern then you can use it to make a larger panel by overlapping the pattern.  Be careful with your plate placement so you don't flatten the pattern you already have.  More usually you end up with a slightly less crisp overlap.  You can also extend non-repeating patterns and disguise the joins by using design elements such as fussy cut images, die cuts or ribbon.  I used a piece of ribbon to disguise my imperfect extension with the Do-crafts Candy Cane folder on this slightly taller piggy christmas card.


You might also have a design you can extend in another way.  This Father Christmas folder from CraftStash is 10 x 15cm, but by embossing it on the left hand side of a 10 x 20cm piece of card and adding some score lines on the RHS I was able to extend this image to make a DL card.  I smeared the embossed lines with black archival ink and then coloured it with Promarkers and distress inks.  


Tip four

Check Jo's Technique Time post from last month for masses of fab tips on misting your cardstock.


I hope you have enjoyed my little tips today.  The next challenge starts on the 10th, so see you then.  Thanks for dropping by.  Hugz

Sunday, 17 January 2021

Challenge #4 - Inspiration

 Hello Squashettes.  Gail here today with a little reminder for the current challenge.  Lots of lovely entries already for this fun theme.  Thanks for all your support and kind words.


Use any Embossing Folder AND an animal

 
Use any embossing folder and an animal. Please make sure you include both parts of the challenge on your card and also check da roolz to ensure your entry will be eligible for the random prize draw!
 
I combined Nellie Snellen Snowy Cottages embossing folder with a fussy cut sheep!
 
 
I embossed a panel of white card with Nellie Snellen Snowy Cottages embossing folder and added some Sky Blue archival ink over the embossed areas.   Then I went a little crazy with the glitter glue LOL. Winter sparkle!!!!   I mounted the panel on a pale blue card base.  I stamped the front half of Hobby Art Baa Humbug Sheep on some white card, fussy cut, added a touch of pink Promarker to his face and added him to the card
 
 Join the fun for a chance to win an embossing folder from the Prize Vault.

 Thanks for dropping by.  Hugz

Thursday, 24 December 2020

Challenge #3 - More Inspiration


Hi, it's Jo here just to remind you that there are still a few days left until the end of the current challenge on December 31st. Thanks to everyone who has already played in this challenge - your cards are fabulous and so inspiring!


Now, I don't know about you but I always love a quick and simple Christmas card. Here's one I made that came together very easily.


The snow storm/ major blizzard embossing folder creates a very deep impression, but does look good IRL. Unfortunately, I've lost the packaging, but found a very similar EF here.  I decided to alphabetize my stamp sets recently (what a wonderful help this is) and re-found this little cutie from MFT. She's called Snow Day - Pure Innocence. MFT don't appear to produce this stamp any longer, but if you click on the link you'll find something just as cute!


As this will be our final post before the festivities commence Gail and I would like to wish you all a very merry Christmas. We both hope that Santa brings you new crafting goodies and that however you spend it, you have a lovely festive season! See you in 2021 for more embossing folder fun.

It's a ho, ho, ho! - from Gail and Jo!


Thursday, 10 December 2020

CHALLENGE #3 - USE ANY EMBOSSING FOLDER AND DIES/FUSSY CUTTING

Welcome, welcome, welcome to the third challenge here at 

Let's Squash It! 

Let's Squash It! is The Embossing Folder Challenge.  We are gonna help you explore the world of the not so humble embossing folder and encourage you to dig 'em out, knock the dust off and find old, new and fun ways to make your projects pop. 


We have an awesome team to keep you entertained and awesome challenge themes to stretch your creativity and get you using all those long forgotten and neglected embossing folders. 
For those of you who are just tuning in you can check the previous posts for the story behind the genesis of the challenge and the technique posts for awesome tips and techniques to help you make the most of your supplies and folders.

Challenges start on the 10th of the month and run to the last day at 23.59 GMT.  We will be picking top picks and a winner, who will have a chance to be our guest designer for a future challenge.  There is a little prize on offer for a randomly selected winner and these will all be announced on the 5th of next month.   


So, Challenge #3
And this month's theme is

Use any Embossing Folder AND Dies/Fussy Cutting


Use any embossing folder and also die cuts or fussy cutting. You can use an emboss and cut folder, or a die cut with a matching folder, or chop up your embossed thing, or emboss a die cut thing or fussy cut thing, or just add a die cut or fussy cut something to your embossed background.  Please make sure you include both parts of the challenge on your card and also check da roolz to ensure your entry will be eligible for the random prize draw!

We are very pleased to have our first Let's Squash It!! Empress joining us as our guest designer this month.  Please welcome Linda.

"Hey sister Squashettes – I’m Linda W. (aka ScrappinBari) who blogs at Scrappin’, Stampin’ & Singin’. I started out scrapbooking but switched over to card making in 2007. I live in the Twin Cities, Minnesota, USA & haunt several local craft stores! How many embossing folders do you own? I own a fair few and am grateful to Gail & Jo for bring them into play at Let’s Squash It!! I’m delighted to be their first Guest Designer!!!”

 
Linda's Card uses
Taylored Expressions Embossing folder - NORDIC HOLIDAY
and
Stampin’ Up’s Embossing folder - SUBTLE 3D (for the grid)

Isn't that fun with those little cut and embossed panels!
 
 
And here's some inspiration from the team......
 
 
Gail's Card uses 
Nellie Snellen Embossing Folder - CANAL


Jo's Card uses 
Darice Embossing Folder - BOLD DAISY


Please do check da roolz to make sure you will be in the running for da prizes.  

This months randomly selected winner will be able to choose a prize from the
 
Now it your turn!
Grab your embossing folders and dies or scissors and join the fun.
We are looking forward to seeing your cards.


You are invited to the Inlinkz link party!

Click here to enter

Tuesday, 8 December 2020

Technique Time December - Cutting It Up


Hello Squashettes!  Gail here today to talk about cutting!
In addition to embossing folders I love dies and I am also a big fan of fussy cutting.  In combination with embossing folders these can really add wow factors to your project.  


Maybe you are lucky enough to own one of the cut and emboss folders.  These can be really beautiful, but they tend to be a bit more pricey.  These have built in dies so the whole cut/emboss process is super quick and easy.  This is a Marianne Designs folder that I use quite often.  I've embossed corrugated card and smeared some black ink on it.  A contrasting colour behind the cut outs gives a great pop of colour.

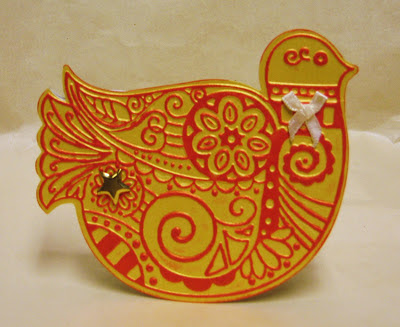
You can also find embossing folders that have matching dies.  If you are going to use an embossing folder and die together I have found it is better to cut first and then emboss.  You have better control on where the embossing is going to be and it doesn't get flattened by going through your machine a second time with the die.   I have quite a few of these types of sets from Sizzix and Cricut.  A few years ago I made rocking Christmas cards using Sizzix Bird #2 embossing folder and matching die.

Sizzix also have a range called Embosslits which cut and emboss at the same time.  These can be really fun, especially with mirror of metallic card.  The wreath on this tag is made using an embosslit folder.  I added some distress ink colour and red enamel dots.

Maybe you don't have any of the folders mentioned above.  You can still use dies to cut shapes and emboss them, but fussy cutting is also an option.  The simplest version of this would be to cut simple shapes, or even use some scraps you have hanging around.  An embossed patchwork background can look lovely.  If you want to get a bit more adventurous you can cut out embossed elements or cut away sections of the embossed detail to give a totally new look.  This also allows you to stretch your embossing folders and use them in more ways.  I inked Sheena Douglas Web Flowers folder with Candied Apple distress oxide and embossed a scrap of yellow card.  Then I cut the flowers and added a die cut birthday sentiment.  

 
This technique means I can use these pretty flowers for many other projects without the spider web.   

I hope this post has given you some ideas or reminded you of some folders you have forgotten about.  The next challenge starts on the 10th, so see you then.  Thanks for dropping by.  Hugz