Showing posts with label Technique Time. Show all posts

Sunday, 8 May 2022

Technique Time May 2021


Hi there, Squashettes, it's Jo here dropping by with a Technique Time post for you!

I'm here to talk patterned or design papers with you. Let's face it, we all have waaaay too many paper pads in our stash, right? I was having a little tidy and began wondering about how embossing would look on some of the papers I have in my collection. I grabbed a few sheets and decided to give it a try.

My first effort went like this:

Before

And after


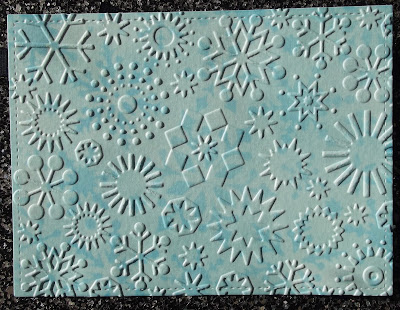
Mmmmmm, well, ok. This does look lovely, but the pattern on the paper is completely dominated by the embossing. I also noticed that the DP cracked in some places as I'd decided not to spray it because the paper is quite thin. However, it's not really noticeable unless you hold it to the light.

Next, I decided to pair a folder with less intense patterning with a paper with a repeating or less random pattern. I put the paper inside the EF to give me an idea of how this might work.


This is lovely IRL, and will make a sweet background for a future card.


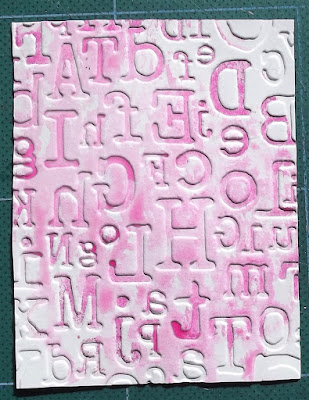
Then I threw caution to the wind and paired horizontal lines with an alphabet EF - nice!


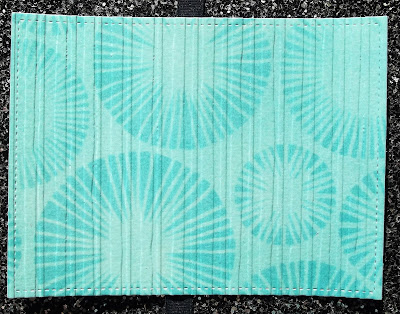
Next, I found this very ordinary looking paper (told you I have a lot of paper) and paired it with this gorgeous EF...


I love the result!


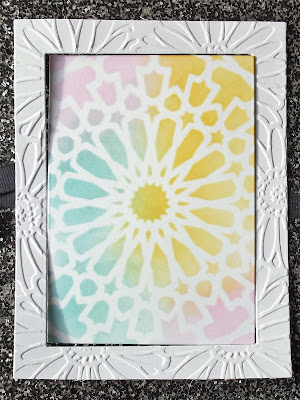
All of this embossing patterns began to remind me of my patchworking and quilting days, so I tried a little paper patchwork with some tiny leftovers.


After trying it in my folder, and looking carefully at where the lines needed to cross the pattern, I made this!


I think the knack to embossing design paper is to look carefully at the patterns on both the EF and the paper - do they compliment each other or do they contrast to good effect? Very busy designs will probably end up looking too jumbled, so just take a while to look at what you have and see what works best in combination. 

This is such a fun technique and really gives some added Va Va Voom to your design papers, so why not give it a try? And why not take part in the next Let's Squash It! Challenge that is only two days away... 


Tuesday, 8 March 2022

Technique Time March 2022


Hi there, it's Jo bringing you a Technique Time post ahead of the new challenge at Let's Squash It! Gail and I have decided that not all of the challenges need a TT post, so we'll drop by any time we think we've hit on a fun technique we want to share... so watch this space!

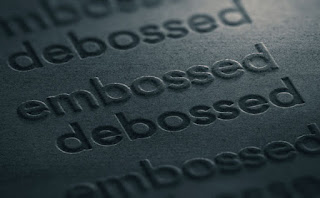
Obviously, one of our goals here at Let's Squash It! is to help you s-t-r-e-t-c-h those embossing folders and what better way then to have some fun with debossing. 

What do I mean by debossing?


Embossing gives you a design that's raised up from the surrounding material, while debossing results in a pattern, wording or image that is recessed into the surrounding material.

If you're anything like me you probably discovered debossing the first time you accidently flipped your embossing folder before running it through your embossing machine!

Here's an example of how different embossing and debossing can look. 


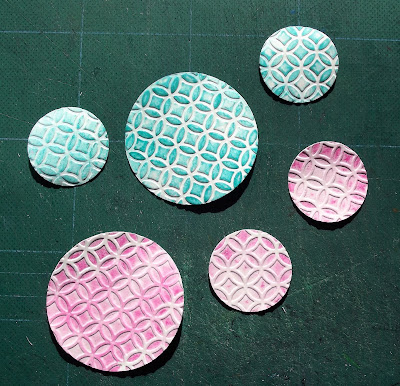
I picked a gorgeous folder from Kaisercraft called Stained Glass for this little demo. The blue debossed pieces emphasize different elements of the design and give you a whole new look.  

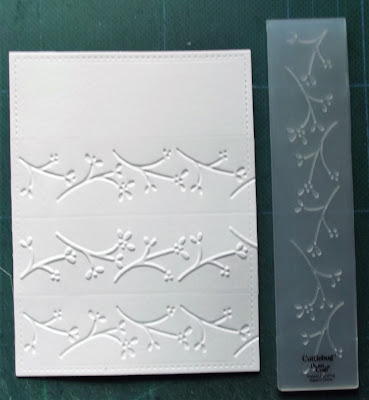
And take a look at this sweet little border edge folder - two great looks for the price of one!


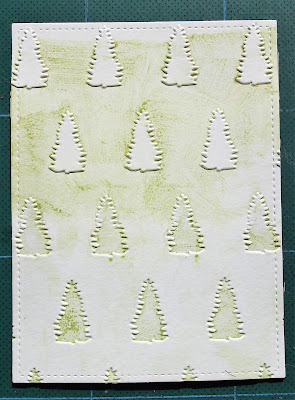
Finally, I tried using a Christmas Tree folder and, again, I added some ink just to emphasise the difference:


To be honest, I love both looks. This just needs spraying with water and I'll have a lovely background with which to work.

You'll need to choose your folders carefully as numbers, letters and certain images don't necessarily work when debossed as they'll come out backwards. However, I think this gives yet another really cool, quirky effect!


I hope this brief post has got those creative cogs turning. Our new challenge is only a couple of days away and I wonder what it could be??? Hurry back to find out!

Wednesday, 8 December 2021

Technique Time Taking a Break


Hello Squashettes.  Gail here today, dropping by to say there's nothing happening this month in regards to Technique Time.  I expect you are busy as well with preparations for Christmas, so we are taking a break.  We also feel that we have lots of techniques already covered, so if you are feeling bereft, grab a cuppa and take a meander through the previous posts.  There might be just the inspiration you are looking for for that perfect card.  See you here on the 10th for Challenge #15.  Hugz

Technique Time Posts


Monday, 8 November 2021

Technique Time November 2021 - Stencil and Emboss


Hi there, anyone else having trouble accepting that it's November??? Thankfully, here at Let's Squash It! a new month brings a new technique and a new challenge, so it's not all bad.

Today, I'm going to share some of my attempts to combine two of my favourite cardmaking techniques: stencilling and embossing. This really won't be a 'masterclass', but I thought I'd show you some of my hits and misses with this technique.

I started off by thinking I could just grab a great folder and a great stencil and the magic would just happen. However, that's not really how it went, as you can see below.

No details on stencil. EF is from Cuttlebug.

I'm just not sure about this one... Hit or miss? A lovely stencil and a lovely embossing folder, but maybe not together.

Next, I tried this...

Funky Fossil stencil and Distressed Lines EF by Creative Expressions.

These patterns really work together to create something harmonious and rather beautiful.

Tumbling Hearts stencil and Distressed Lines EF by Creative Expressions

This seems to work too and looks almost like fabric.

I decided to try a few other possible ways of combining a stencil and embossing folder. I think this may be 'cheating'!

AALL & Create Barbary Stars stencil and Cuttle Bug EF

Interestingly, the embossing process very slightly 'shrinks' the embossed card because it has taken on the pattern of the folder. This means that there is no longer a perfect 'fit' when you replace the middle panel. A floral stencil would have been lovely with the daisy border.

I liked the idea of framing the stencilling, so tried this:

As above for stencil and X-Cut EF

Oh, dear! Battling patterns again! 

My next attempt is slightly better; I think there may be a slight struggle going on here, but no battle between the patterns. I LOVE the frame effect sooooooo much but the central panel should be solid for this to be hailed a success.

MFT Stencil and EF as above.


Then I had a cardmaking epiphany, and went hunting for a very simple stencil and a simple EF, where the pattern wouldn't break-up or visually fragment the stencilled image. 

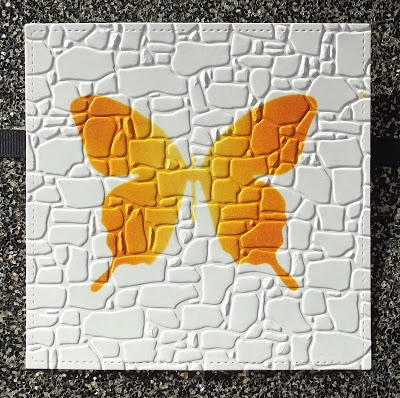
Papercraft Magazine stencil and Gemini EF - Set in Stone

Yes, I think I cracked it - simplicity is the key. Solid stencil patterns look great with an EF pattern. At this point I went and lay down in a dark corner for a while.

I hope you've enjoyed seeing my ups and downs with this technique. It's been a journey, people!

Only two days to wait for a brand new Let's Squash It! challenge... I wonder what the theme might be? 😜😜

Friday, 8 October 2021

Technique Time October - Double Emboss

Hello Squashettes!  Gail here today with another Technique Time.   


We hope these posts will help you find some fun new ways to stretch your embossing folders, or maybe just remind you of some techniques you haven't used for a while, so grab a cuppa and take a look. 

 Today I am investigating the effect of double embossing.  There are a number of ways to combine embossing folders and other embossing techniques.


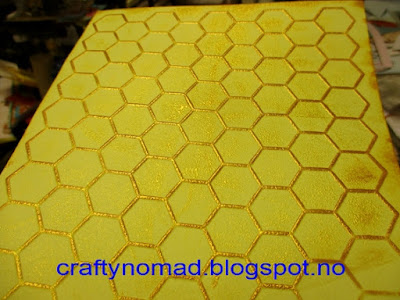
Probably he first one that springs to mind is emboss your card with your folder, swipe the texture with sticky ink, sprinkle embossing powder and heat.  Here I used DoCrafts A5 Honeycomb embossing folder, yellow card and bronze embossing powder.  So pretty!!


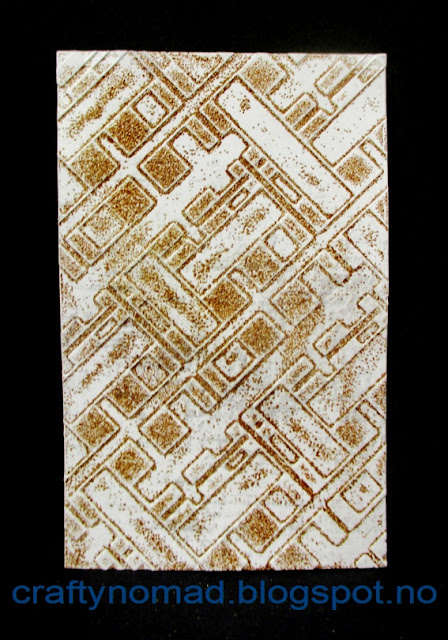
You can also swipe the embossing folder with the ink, emboss and then do the heat embossing.  This will allow you to heat emboss your debossed areas.   I used a plaid embossing folder that came with Lisa Horton Inspired to Create issue 68 magazine.  OK, I admit I bought the magazine for this folder!!!  The flower die cuts were cute as well, and the enamel dots, but really, this folder!!  I inked the flatter side of the folder, embossed my off white card and sprinkled with Vintage Photo distress powder.  Not sure the distress powder was the best choice, but I am already seeing ideas for this experiment.....


Embossing powder doesn't mind going through an embossing folder.


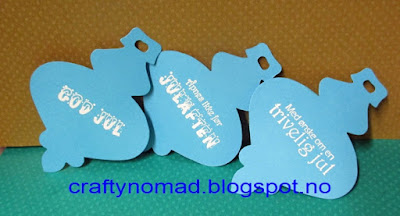
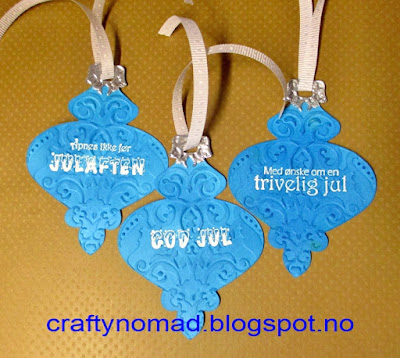
I cut these blue baubles using Sizzix bigz die and white embossed some christmas sentiments using Rubber Dance stamps.

Then I embossed the baubles with the matching embossing folder and swiped them with some blue ink to highlight the texture.  Just wipe the ink off the white embossing to make it pop again.


You can also use embossing powder to 'enamel' a die cut or piece of card and then emboss it


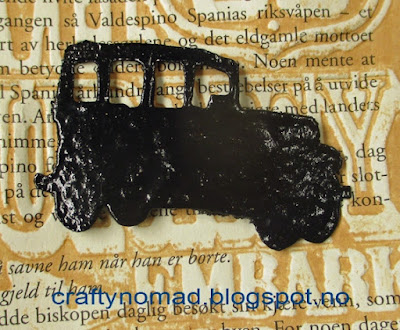
Yet another UFO in progress LOL.  There is a veritable UFO convention on my desk at the moment!!!  I cut Sizzix mini old jalopy from a scrap of card and applied layers of black embossing powder until it got quite thick and glossy.   A bit uneven, but grunge is OK for this project.  


Then I embossed the word Voyage using Sizzix Journey Background texture fades folder.  If your embossing powder goes a bit dull a quick blast with the heat gun can liven it up again.  Do go careful with your pressures if you are embossing a thick embellishment like this..........


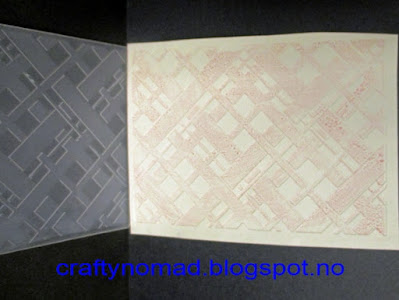
Something else I have done before, but not seen other people do, is to use two different embossing folders over the top of each other.  

This is the same Plaid folder I used already.  Totally different look here with the emboss rather than deboss side!  I inked it with Spun Sugar distress ink for some subtle colour.


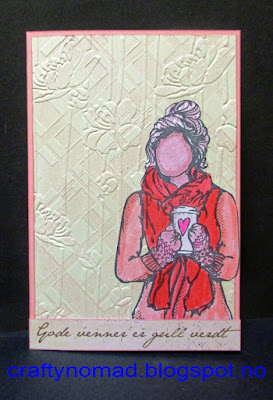
Then I ran it through my bigshot again, this time using DoCrafts A5 Cherry Blossom Stripe folder.  Gosh, isn't that pretty!!!!  So pretty I had to make a card........


Sorry for the crazy changing tones.  Light levels are beginning to get low here in Norway and my camera did not approve of my subtle effects.  But Camera did like when I added this bright pink Unity girl and a pre-printed sentiment strip which says 'Good friends are precious as gold'
 

I hope you have enjoyed my embossing on embossing ideas. If you have any other ideas do share if you are experimenting.  We will be back on the 10th with another challenging challenge.
Maybe you can guess the theme???? 

See you there.

HUGZ


Wednesday, 8 September 2021

Technique Time September - Sand It

Hello Squashettes!  Gail here today with another Technique Time.   


We hope these posts will help you find some fun new ways to stretch your embossing folders, or maybe just remind you of some techniques you haven't used for a while, so grab a cuppa and take a look. 

 Today I am investigating the effect of sand paper on embossed textures.  

Here's a few of the ones I have tried


The first one that springs to mind is using a core card.  This is a type of card that is a different colour on the outside that on the inside.  There are many types of card produced in this manner.  Often the core is white, but it can be other colours, in this case this bronze card has a black core.  I used Cuttlebug Circus Monkey folder.


If you don't have any core card, or don't have the colour you want, you can easily make your own.  I have used ink in the past to colour the card and then emboss and sand it.  Today I decided to try paint.   I used Colourcraft Aztec pink paint on white card, embossed with Cuttlebug Qwerty embossing folder and sanded for a pretty effect.

Another favourite of mine to use is scratch paper.  That's the coloured paper covered with black wax which you scratch off.  Here I used it with Sizzix Spiderweb folder.  Be gentle with the sanding on this stuff cos both the wax and the coloured layers are often very thin and it's easy to sand right through!!  I meant to emboss the spiderweb for a bright design on black, but debossed by mistake!  Actually the black web looks pretty cool on the bright background.  There are no mistakes in art!!!

Something I never tried before was sanding embossed metal.  Jane did this for her inspiration piece for the last challenge so I thought I'd give it a go.  I used blue metal and Nellie Snellen Let It Snow folder.  Pretty!!!!!


Then I thought I try the technique with some plastic packaging.  I embossed DoCrafts 3D Pocket Watch folder and sanded the back side.  It will probably be best against a dark background, but I like this result.  Also it's something to do with the plastic that has got scratched and can't be used for shaker windows!!

 In conclusion, I think a busy pattern works best for sanding because there is less chance of scratching the background.  I wrapped my sandpaper around an acrylic block and kept everything as flat as possible to avoid sanding the debossed areas as well as the embossed one.
Use the finest sandpaper you can find for an even effect.
Wear a mask, LOL, or do your sanding outside!!!  The clean up is so much easier and I think there is already plenty of dust inside my house without making more, especially plastic dust!!!
Have fun!  Fun is very important.

Well, I couldn't leave all those lovely pieces unused could I??  I've used Carmen's Veranda Charlie Chaplin and sentiment for the Lost Coast Designs Movie Mania challenge.  Shameless promoting!   Maybe see you there.

OK, that's me done for today.  I am sure there are other things you can think of to use so do share if you are experimenting.  We will be back on the 10th with another challenging challenge and fun theme and another awesome guest!  See you there.

HUGZ


Sunday, 8 August 2021

Technique Time August 2021 - Embossing different materials

  Hello Squashettes!  Gail here today with another Technique Time.   


We hope these posts will help you find some fun new ways to stretch your embossing folders, or maybe just remind you of some techniques you haven't used for a while, so grab a cuppa and take a look. 

 Today I want to look at things we can emboss other than paper and card.  

Here's a few of the ones I have tried

Vellum

Vellum gives a lovely effect with the embossed areas turning opaque.  A die cut circle embossed with Do-crafts 3D Clocks adds a nice subtle detail to this card.  If your vellum is thin, or your folder 3D, go careful with your embossing pressure or you might get some holes.  I solved the problem by sticking a duck over the little boo boo!!!  Remember die cut before embossing!  


Acetate and Plastic

All that crafty plastic packaging that just goes in the bin can give some very fun effects when used with embossing folders.  I used Sizzix Ledger folder to add an interesting layer on this ATC.  Hide your glue/tape behind a strategically placed sentiment or embellishment


Scratch Paper


Raid the kids craft box for scratch paper or make your own!  That colourful card with the black wax coating you scratch off.  Embosses beautifully and then carefully scratch off the raised areas for a wow effect. This is Sizzix Flourish folder.  


Metal Sheets

Metal sheets have already made an appearance at Let's Squash It! in our very first challenge so what can I say??  Blubb Blubb!!  Metal sheet + embossing folder = awesome!  This is Sizzix Mermaid folder. 


And for a final surprize.......

Something I have been thinking about trying and what a fab result!!!!!!!!

 Leather!!!!!!!

How cool is that!!!!   I know you can tool leather so I thought I'd give it a go with an embossing folder.  I bought some leather scraps off amazon and found a piece that wasn't too thick and ran it through my Big Shot with Darice Tickets embossing folder.  Things to remember.....  The leather is quite a thick layer, unless you get a really thin bit of pig or some such, but it will compress when embossed, but go gentle with your pressure.  Also, the leather stretches and tends to move so only run it through once for a nice crisp impression.  If you want to run it again make sure it hasn't moved at all.  

I used this piece to make this card and I'll put all the details on my blog if you are curious.  

Thanks for dropping by.  We will be back on the 10th with a brand new fun and exciting challenge and another lovely guest designer.  Take care.  Have fun.  See you soon.  Hugz