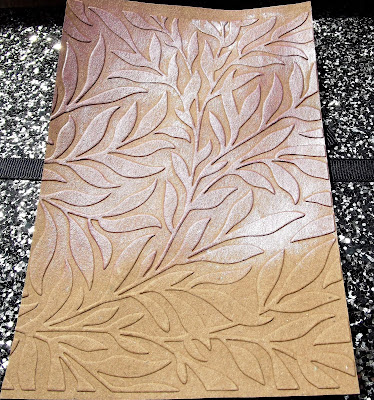
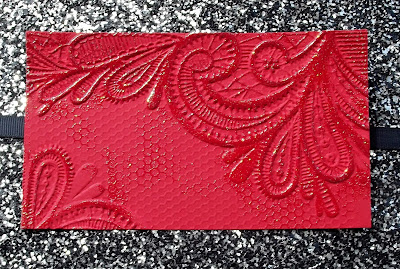
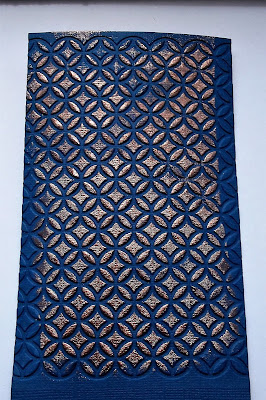
I'm currently more than a little obsessed with heat embossing my dry embossed panels.
 |
| Paisley - Sizzix Embossing Folder |
 |
| Paisley - Sizzix Embossing Folder |
Hello Squashettes! Gail here today with a little blingy inspiration for the current any folder and use a shimmery/blingy medium challenge.
I decided to try the double emboss technique. I am not sure I've ever done this before, certainly not often, but I had some NBUS blingy Wow! embossing powders I wanted to try. Ta dah! Bling!!!!!!
I actually managed to bling my desk, the floor and the cat during the making of this card!!!! I used Wow! Cloud 9 and the glittery bits were really fine. I also used Sizzix Arrows embossing folder and Art by Marlene Roadtrip stamp.
I embossed some turquoise card with the Arrows folder, a blue ink pad to give some extra contrast on the arrows, then versamark and the embossing powder. Bling!!!!
I stamped coloured and fussy cut the cute lady in the car and stamped a TH sentiment on a vellum strip to finish.
Dig out those shimmery shiny mediums, get squashing and join the fun.
Thanks for dropping by. Hugz
Welcome, welcome, welcome to the tenth challenge here at
Let's Squash It! is The Embossing Folder Challenge. We are gonna help you explore the world of the not so humble embossing folder and encourage you to dig 'em out, knock the dust off and find old, new and fun ways to make your projects pop.
Use
any embossing folder and a medium to make it shimmer and shine ie gilding wax, perfect pearls, glitter glue, sparkly embossing powder/paint etc... Please make
sure you include both parts of the challenge on your card and also
check da roolz to ensure your entry will be eligible for the random prize draw!
We are very pleased to have our Let's Squash It!! Empress joining us as our guest designer this month. Please welcome Tina!
"Hi. I am Tina and I live in Slovenia, a country well known for its stunning nature. I have been married to my high school sweetheart and we have one daughter and two sons.
I started cardmaking in 2010 when my husband bought me my green Cuttlebug. I didn't know that one hobby could be so addictive … So, in April 2015 I created my blog to share my passion for cardmaking. Both decisions, to start cardmaking and to start blogging, are among the best in my life, it is so inspiring and I am so happy about all this. I don’t have any specific style, I just love playing with papers and trying different styles and new techniques.
You can find more about me on my blog (http://www.treebug.org/). The name incorporates my passion for environment (»tree«) and card making (»bug« is short for my green Cuttlebug)
I am so happy to be your Guest Designer because I love my huge collection of embossing folders! Thank you!"
Tina says 'For my purple card I sprayed my sizzix embossing folder with nuvo mica mist before running through my cuttlebug. The card is all shining but how to take a picture of this, I don't know, I tried different positions with no success unfortunately... Then I just added some flowers, greenery and gemstones for extra bling.'
You are invited to the Inlinkz link party!
Click here to enter
Embossing is great, right? Here at Let's Squash It! we love to challenge ourselves and to see if we can take embossing a little further to add extra 'Wow' factor to your cards. In this post, I'm going to be looking at how to add a little shine to your embossing to lift it to a whole new level!
My first thought for adding some shine to an embossed panel was to use gilding polish. A couple of years ago I bought some Silver Dream Gilding Polish from Cosmic Shimmer. Unfortunately, the polish has now gone a little gloopy, but I still managed to get some nice effects by using a cloth rather than the sponge that comes in the lid of the container. Using a very slightly damp cloth seemed to help.
My first application was a little heavy.
Gilding paste/polish comes in a variety of colours or finishes and really adds lustre to your embossing. A lighter touch really seems to give better results.
Mmmmm, what else could I use to add some shine to my embossing? I certainly didn't want to 'add to cart', so decided to look through my stash to see what I could utilise.
I was delighted to find that my gold Versa Color cube still had a little ink in it. I doubt if I could stamp with this ink, but the sponge still held enough ink to swipe it across an embossed panel and I love the effect.
This was quick, easy and far less messy than the polish. I used the de-bossed side of the panel and was amazed at how different the pattern appeared in reverse.
 |
| (X - Cut Folk Florals) |
 |
| (Unnamed Folder) |
 |
| (Crafter's Companion - Ornate Lace) |
 |
| (Darice - Bold Daisy) |
 |
| (Kaisercraft - Stained Glass) |
 |
| (Kaisercraft - Stained Glass reverse.) |
Hopefully, you've enjoyed my little tutorial and you're now all ready for our next challenge which is only two days away! Take care, see you soon and keep crafting!
Hello Squashettes! Gail here today to announce the results of Challenge #9.
But you are here for the winner and top picks aren't you? So let's get to it......
Our two runners up, impressing us with their fabulous squashing are:
and
Jeanne
We hope you'll wear your badge with pride!
Our top pick and winner of our Empress of Squash award,
(with a chance to guest design for a future challenge) goes to:
Jane