

No, not the final frontier stuff but how to s-t-r-e-t-c-h your embossing folders and create some 'white space' in your design. Obviously, when I talk about 'white space' I just mean a break or gap in the pattern of the embossing - the space doesn't have to be white.

Thankfully, I'm now in the habit of die cutting first to avoid squishing the embossing!

I think the window looks good cut into the embossed lattice pattern.


P is for Partial

I may not have chosen the best folder to demonstrate this effect, but a score line makes a nice, tidy border to the embossed portion of the card.


Just look how much glorious space there is for your design and/or sentiment! Love it!


How cool is that???
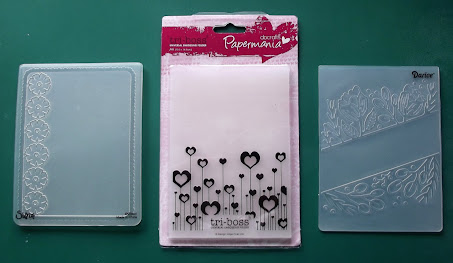
There are so many great EFs out there and many come with a 'gap' in the pattern for a sentiment or image. Just looking through my collection I spotted I'd got these.

If you haven't got folders like this here are a few simple ideas to help you achieve the look.
D is for Die Cuts
A die cut window can give great impact to your card. I decided to use a square die to complement the pattern.


The resulting gap can be used to frame an image or create a window for a splash of colour and a sweet sentiment.


Space can also be created with partial embossing. You can achieve this effect in exactly the same way as partial die cutting - just don't run all of the folder through your machine.


B is for Borders
And what about those cute little border folders we all have?


D is for Diffusers
Finally, we need to talk about diffuser plates - yes, seriously, we do!
White space can be created using a diffuser plate. I tried to make my own diffuser, but failed to come up with a design that went through my Cuttlebug. So I called for some help from the lady with the rabbits and Gail kindly supplied the following pictures to help finish this post.
Gail has a set of three diffusers. You can buy this set from from Sizzix UK or Sizzix USA etc. The set is designed by Tim Holtz and there's a handy video on the Sizzix sites to show you how to use them.

When using the diffusers insert them into your die cutting machine as if they were a plate. Please DON'T add them as an additional plate or your embossing machine may not survive the ensuing battle!
Where the diffuser has a gap you will get a gap in the pattern of the embossing.


Substituting the circle gives you a 'spotlight' impression in the area covered by the diffuser plate.

....................................................................
Thanks for sticking with me during this long post. There are many brilliant techniques for creating space, gaps and spotlights and it was tricky to cram everything into one Technique Time session!
I hope this has got your mojo warmed up and ready to go... We'll be back in a couple of days with the next challenge. Can you guess what it might be?
11 comments:
Some great ideas Jo, thanks! I remember creating a diffuser with a couple of layers of cereal packet many, many years ago - I’m sure I don’t still have it, maybe I’ll have to make a new one!
I like these technique posts, always so many ideas, thank you so much!
Your techniques are always so interesting, thanks so much!!
Thanks also for sharing Gail's help about diffusers! I have TH diffusers, very unused because I was not be able to pass them into my machine :) Now I know what was my mistake and I will use them surely!
I love when you talk Trekkie to me. 😉
Great ideas!
Awesome post Jo. So many fab and inspiring ideas. Love the card with the girl. HUGZ
What an awesome, educational post! I loved learning the new techniques and can't wait for the challenge. Plus you have a great sense of humor!!
Thank you so much, Jo, for taking the time to put this post together and thank you to Gail, too, for the diffuser bit. I found the whole thing very helpful and inspiring! Hugs, Darnell
Thanks for my guest post.
And thanks for the wonderfull tutorials.
Makes you think about using your embossingfolders on a different way.
Some great tips there Jo!
Amazing ideas!
Post a Comment